
Using the iOps360 Uniform module, you can track your uniform items, staff can create requests for items, track suppliers and costs, and which staff have been assigned each uniform type. Staff can quickly request additional items and receive notifications when items are needing their acceptance.
Note: The admin features of the Uniform module are open to users with a permission of SysOp, SuperUser and Inventory Admin.

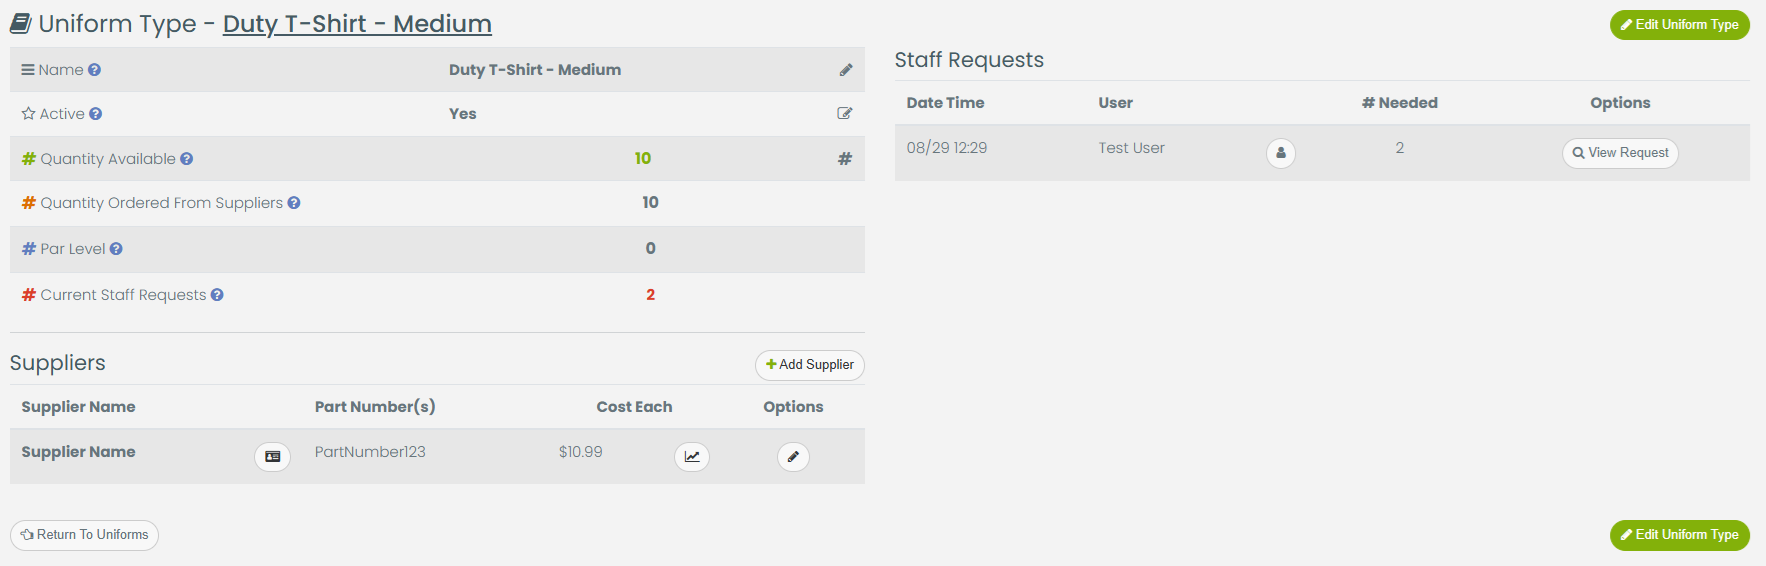
The uniform module allows you to create the inventory items that are issued to staff. You can set your current quantity on hand, which suppliers provide each item, part numbers, costs and more.
Uniform Item Details
To view the item details, click on the tab “Current Items / Inventory”. Select any item from the list. The details page shows the details on the item, the current quantities, par level, quantity on order, suppliers, and current staff requesting this item.
Uniform Requests
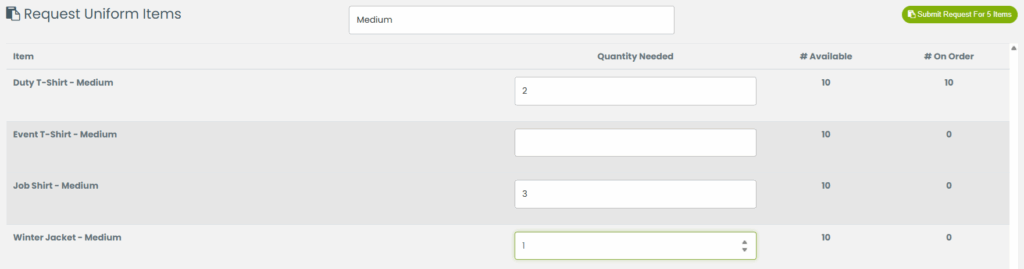
Staff can request uniform items any time using the Uniform Request button in the top right hand corner. Staff will see the current number available and also the quantity on order. Staff can request more than is currently available. Use the search tool to quickly filter items to a specific type or size. Once the request is submitted, the designated staff will receive a notification. If no staff are designated to receive the notification, the SysOp permission users will receive the notification.
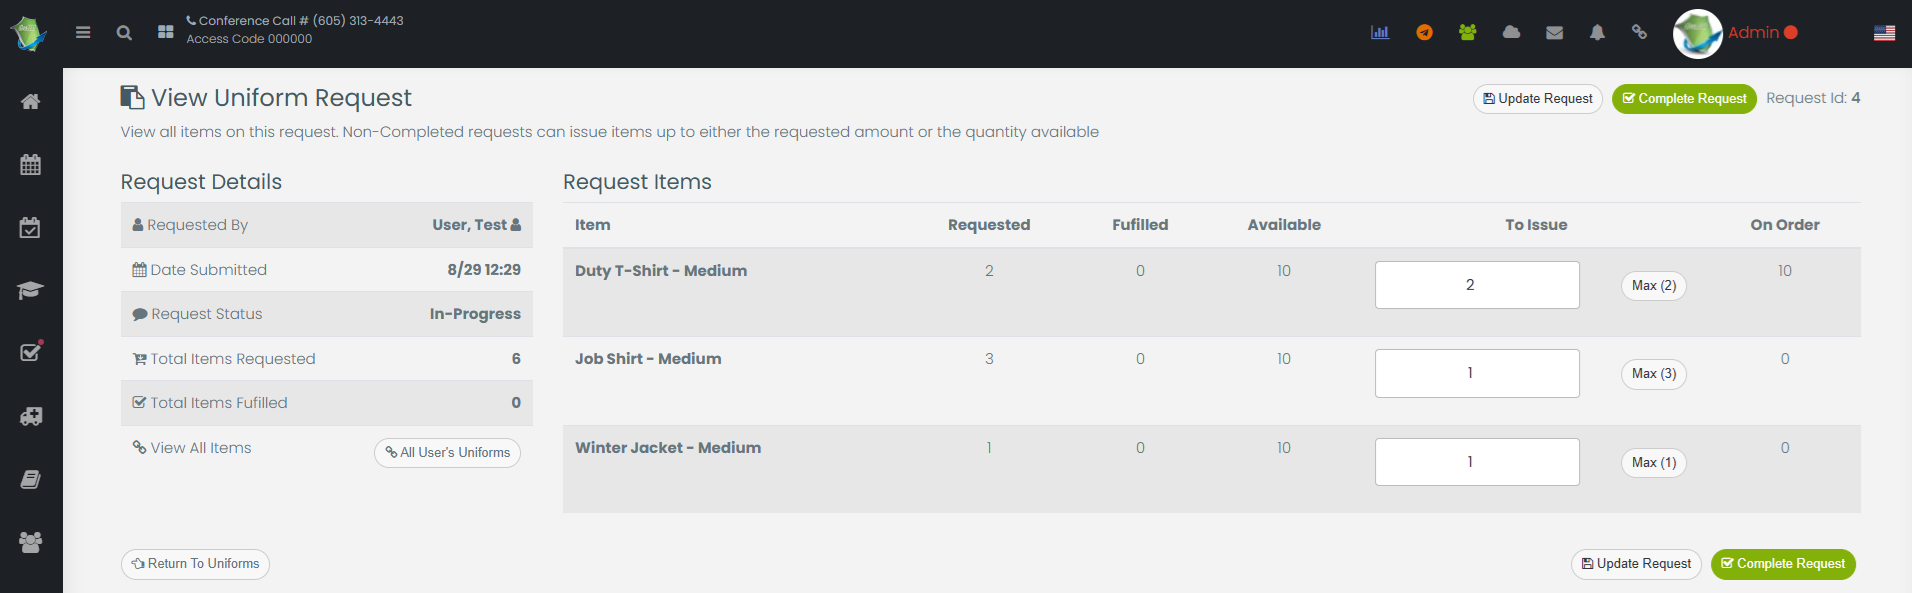
Fulfilling Uniform Requests
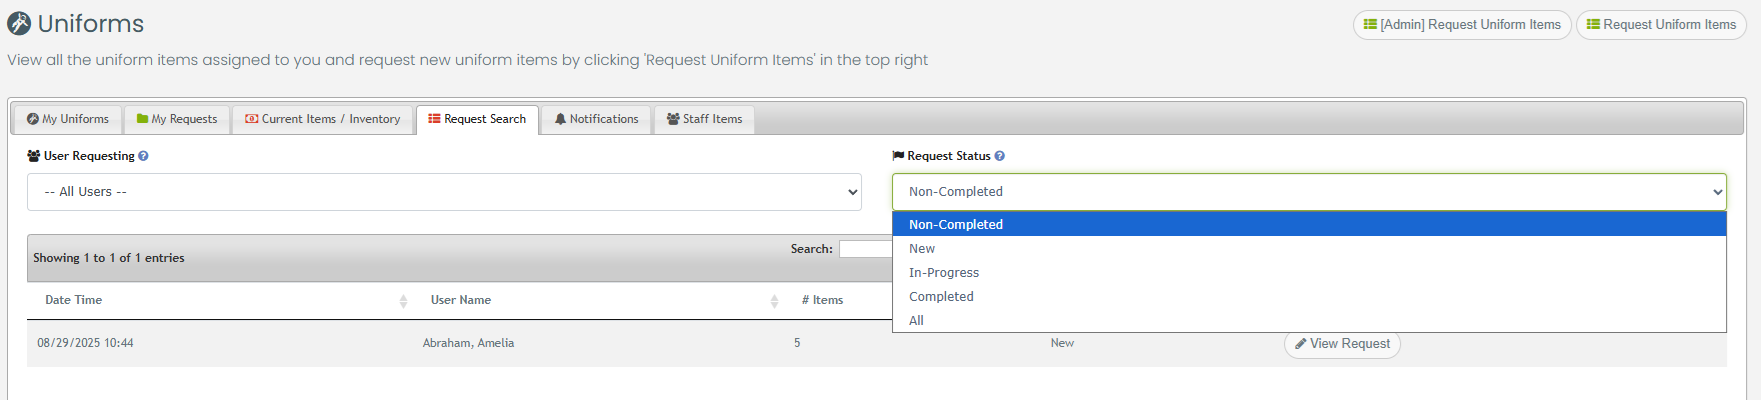
Once a request is received, a notification will be sent to the designated staff in charge of uniforms. To configure which staff receive the notification, see the Notifications tab on the Uniform Module. If any request is not present, ensure the Status filter is set to Non-Completed. Adjust the Quantity To Issue to a maximum of either the amount the user requested and/or the amount Available. Click on any item to navigate to the item details page and adjust the quantity available if needed. You can issue partial items by adjusting the quantity to issue and clicking the Update Request button. Once all items are issued that can be issues, click Complete Request. Staff will receive a notification that items are awaiting their acceptance.

Staff Acceptance of Uniform Items
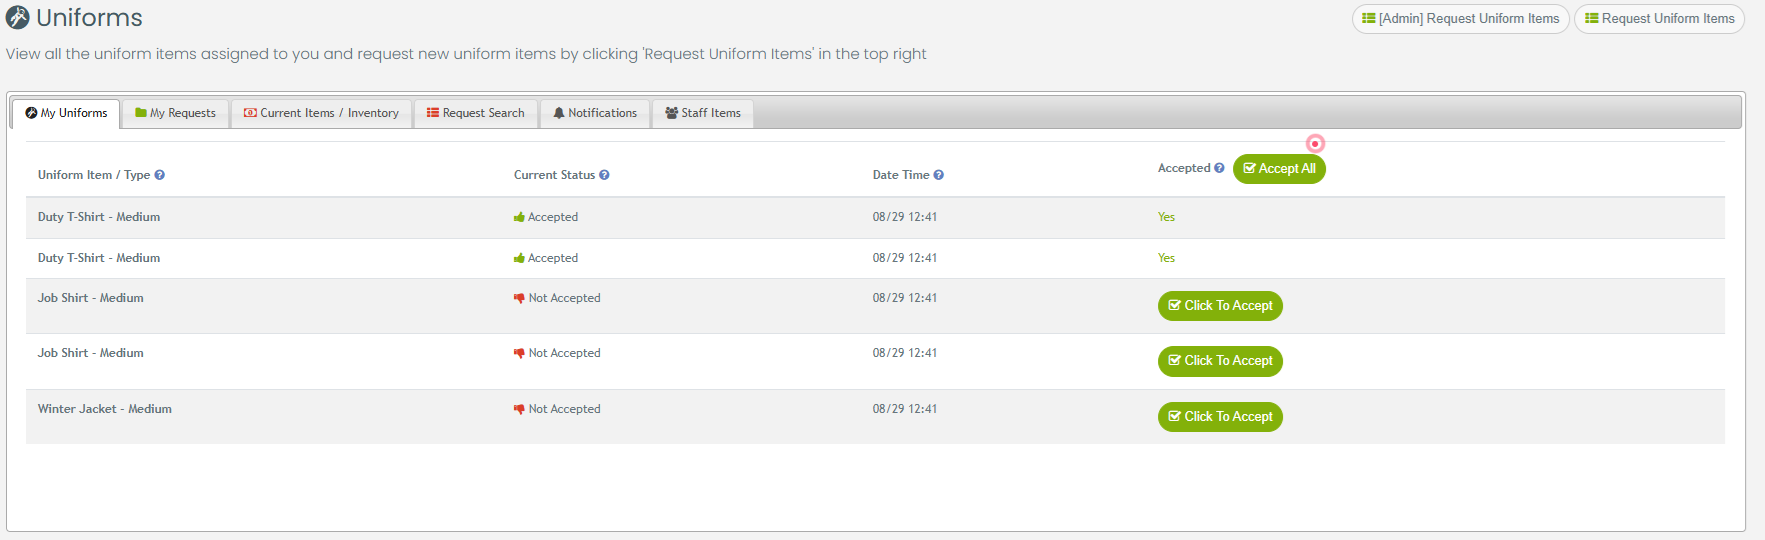
Staff can see the issued uniform items at any time by clicking Uniforms from the menu bar. Click Accept or Accept All to record that you have received the correct items. The date time will be saved with each item for quick reference.
Returns, Damaged and Lost Uniform Items
When staff need a replacement item, they can fill out the Uniform Request we saw above. Items Returned, Lost, and Damaged should be removed from their profile. To do this, an administrator (Users with SysOp, SuperUser or Inventory Admin) can navigate to the Uniform Module and select the Staff Items tab. Select the user from the list to see all items assigned to this user.
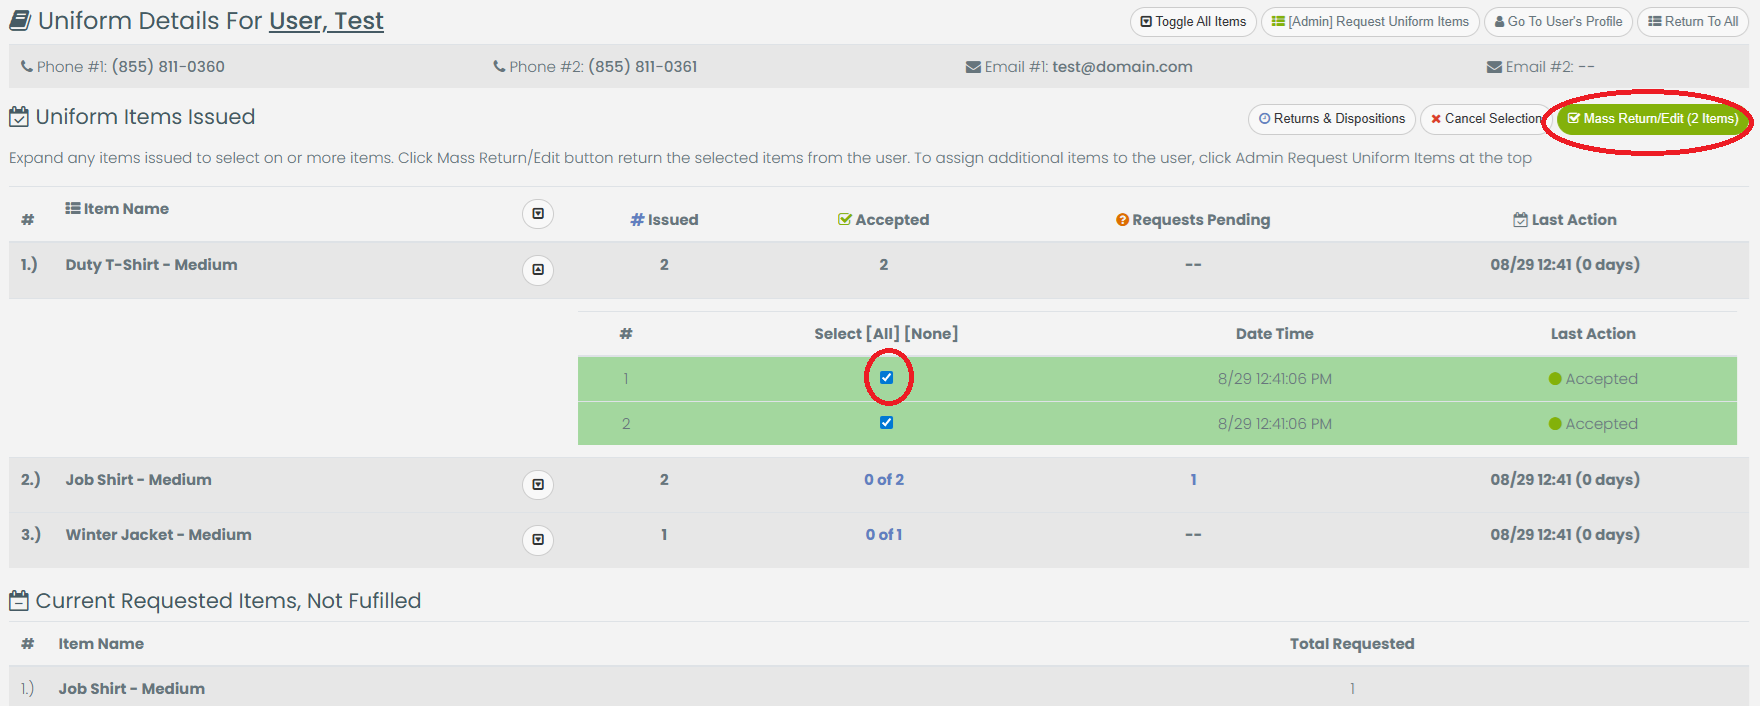
Using the Expand and Collapse carets next to each item or the Toggle All Items button, click the check box to select the items to be returned or marked as lost/damaged. Once all items have been selected, click the Mass Return/Edit button in the top right. Select the reason and confirm to remove these items from the user’s profile. If the Action is Returned To Inventory, the quantity available will reflect the quantity returned. Items marked as Lost, Damaged or Discarded in the popup, will not augment the inventory quantity as these should be discarded.