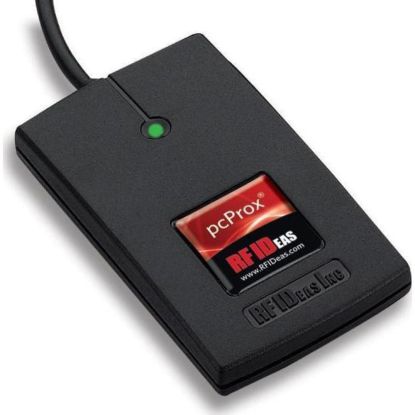
The time clock kiosk allows staff to quick clock in and out using a dedicated iOps360 login and the employee’s existing rfid/nfc badge. The iOps360 reader will scan the most common types of agency badges that are used for proximity door scans and other activities. Feel free to contact us with your specific badge type to ensure compatibility.
Kiosk Hardware / Badge Scanner
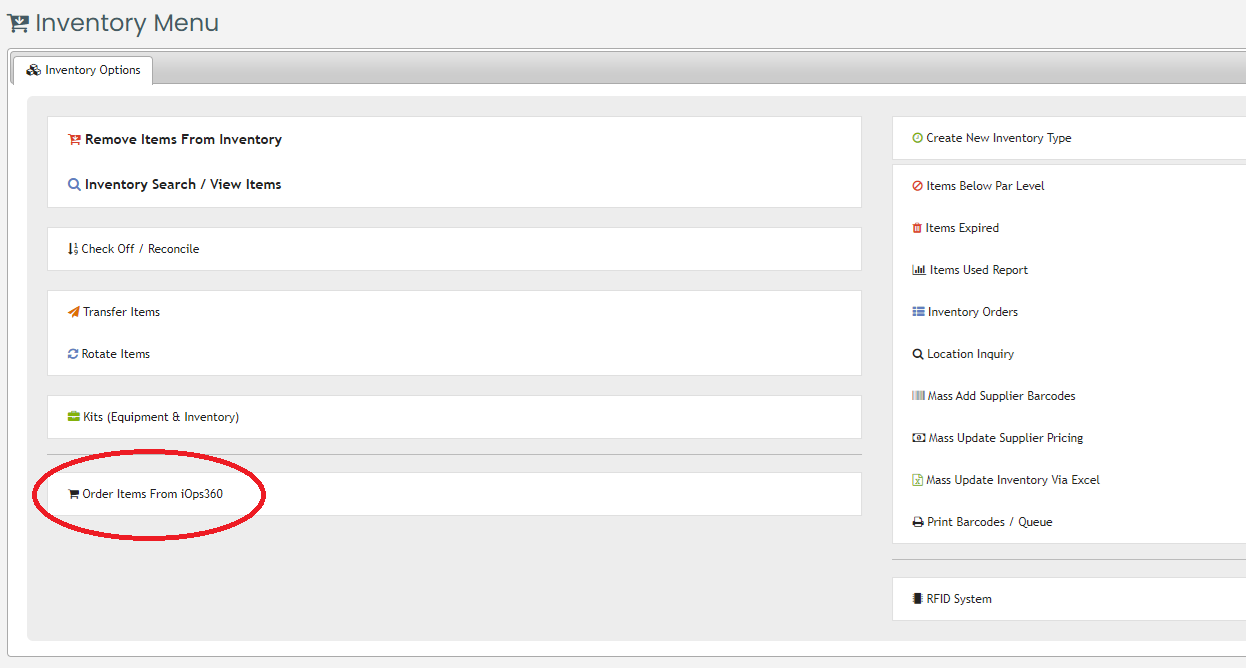
If your agency already has RFID badge readers, those may work with iOps360. If you want to purchase a badge reader, you can order from iOps360 by navigating to Operations > Inventory >Order Items From iOps360. Select the RFID badge reader and we will ship it to you.
Kiosk Setup
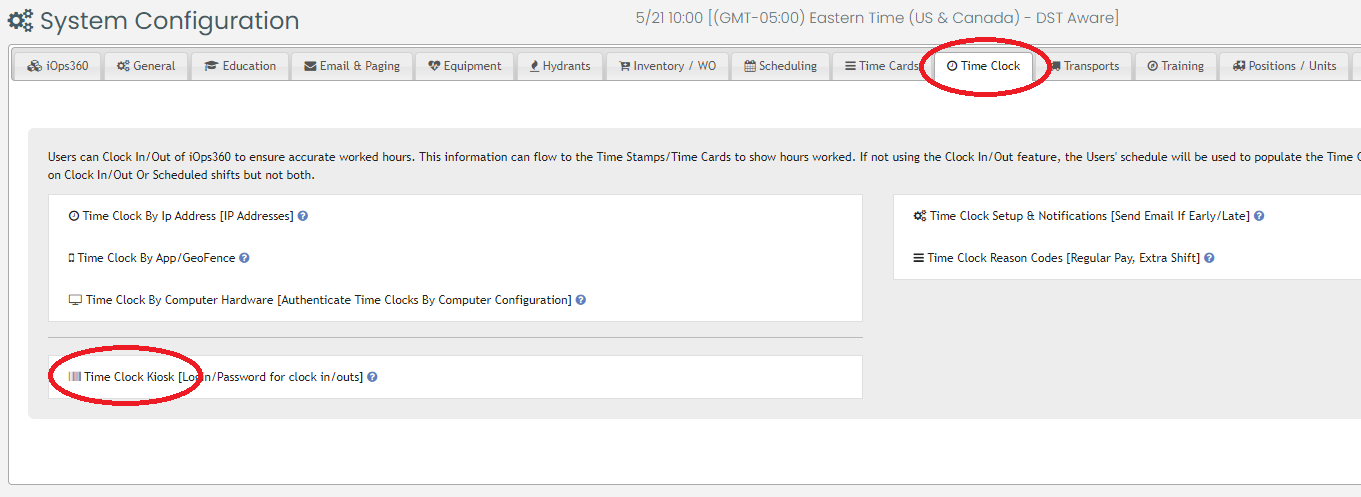
First, navigate to Operations > System Config. Select the Time Clock tab followed by Time Clock Kiosk. Click on Settings and make sure the “Enable Time Clock Kiosk” and “Require Badge Scan” are enabled. This will turn off the ability for staff to use the kiosk with their login and password, using your company assigned badge instead.

Authentication of each kiosk
You want to limit the kiosk to authorized locations to ensure staff only clock in from work locations. If your agency has a static IP address (Your stations always have the same IP or a VPN that reports back to your central IT department), then you can authorize the locations based on IP Addresses. If your agency does not have static IP addresses skip to the next section “Authorization By Computer Hardware”. If you are unsure, you can check your computer’s IP address by googling “What is my ip address”. Then reboot your cable modem and return that website, ensuring that the IP address after the reboot is the same. Note, you must reboot your cable modem and not your wifi router.
Authentication by IP Address
If you agency has static IP addresses (IP Addresses that never change), we will add those into iOps360. If not, skip to the next section “Authorization by Computer Hardware”.
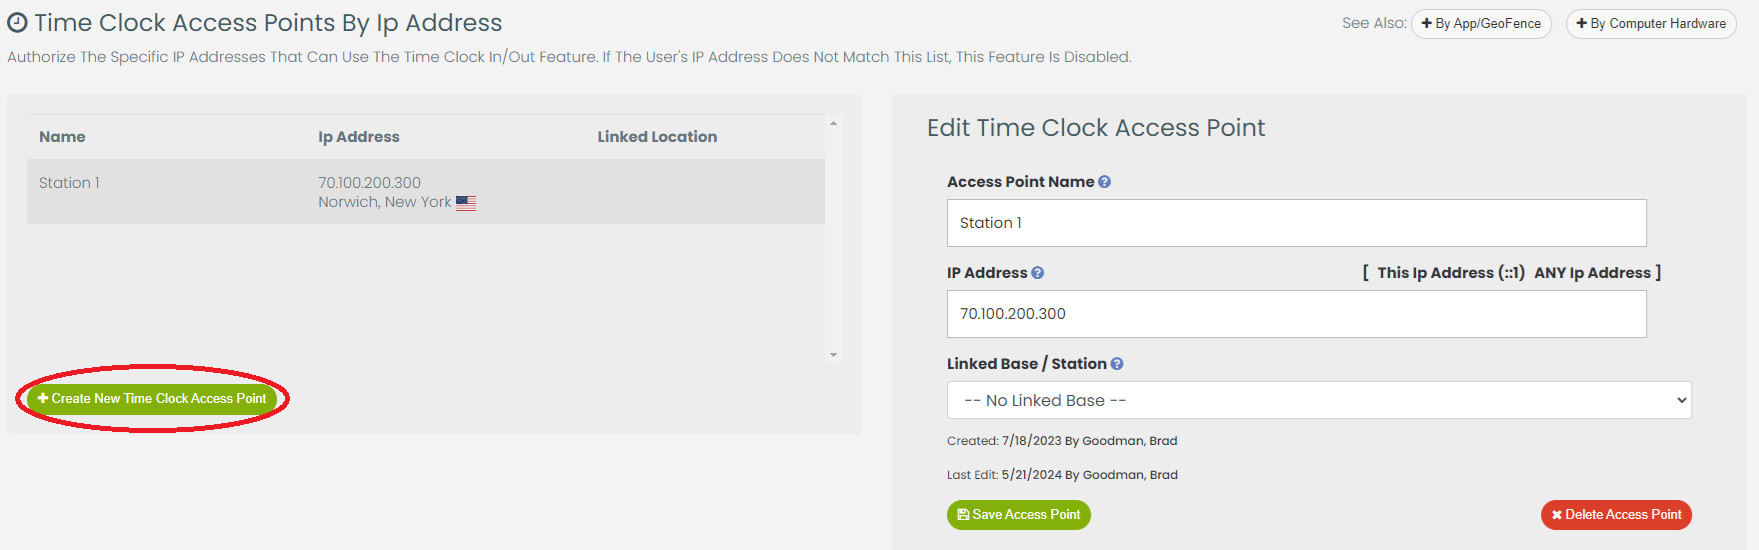
Navigate to System Config > Time Clock > Time Clock Access Points. Click on “Create New Time Clock Access Point“, enter a name for the location, and click the button “This Ip Address” to add your IP address. This will need to be performed for each location/station that staff can clock in from.
Note: The users’ IP addresses are recorded in the system log. You can have a staff member log into iOps360 from each location/station and we will have the IP address of each station. Users on the WIFI of the station and computers should have the same IP address and it will only need to be added one time. Review the system log and location the employee at each station. Copy and paste the IP Address into the Time Clock Access point page to authorize that location.
Authentication by Computer Hardware
iOps360 can authenticate the user based on the computer hardware that is installed on each computer. This includes 80+ data points to determine a unique identifier for each machine. Items include the audio card, monitor configuration, resolution, and many other aspects. This will have to be done for every physical computer that staff are allowed to clock in/out on and it must be done from that computer by an administrator.
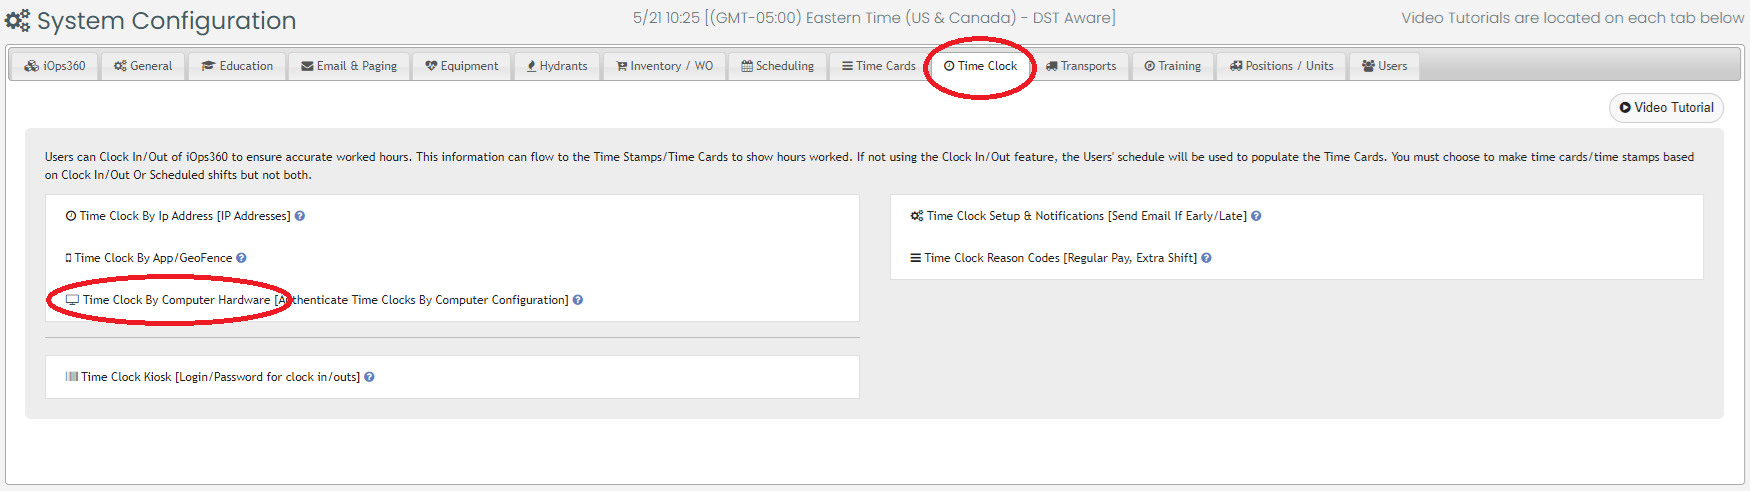
Navigate to System Config > Time Clock > Time Clock By Computer Hardware.
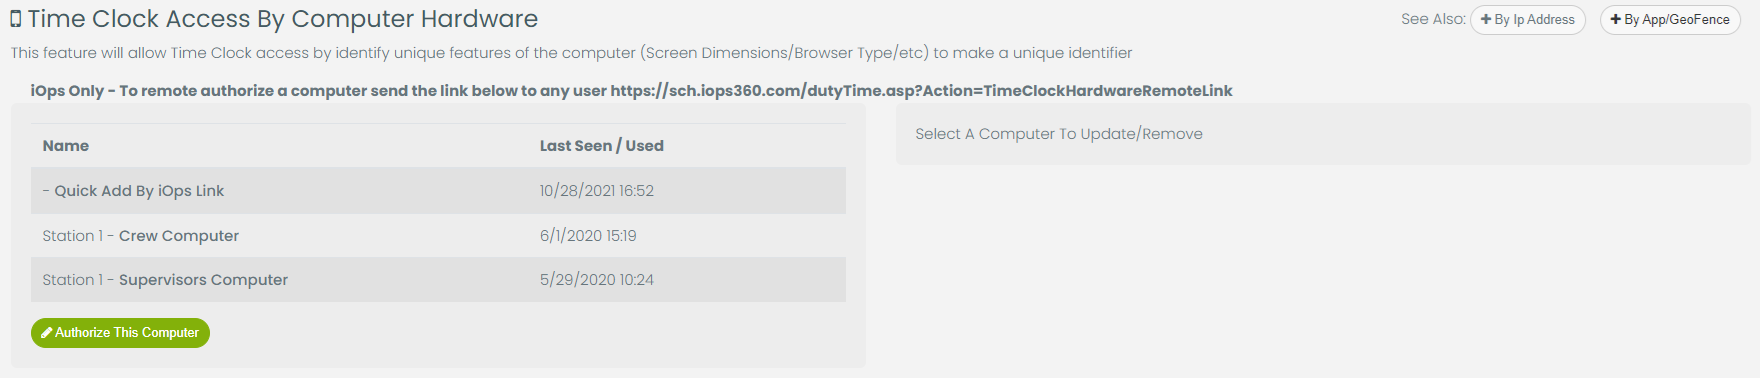
Click the button “Authorize This Computer” and enter a name for the location. This computer is now added to iOps360 and repeat for additional computers at that location if needed. Note: You can also add the computer from the Time Clock > Record Time Stamp page also.
Time Clock Credentials / Login + Password
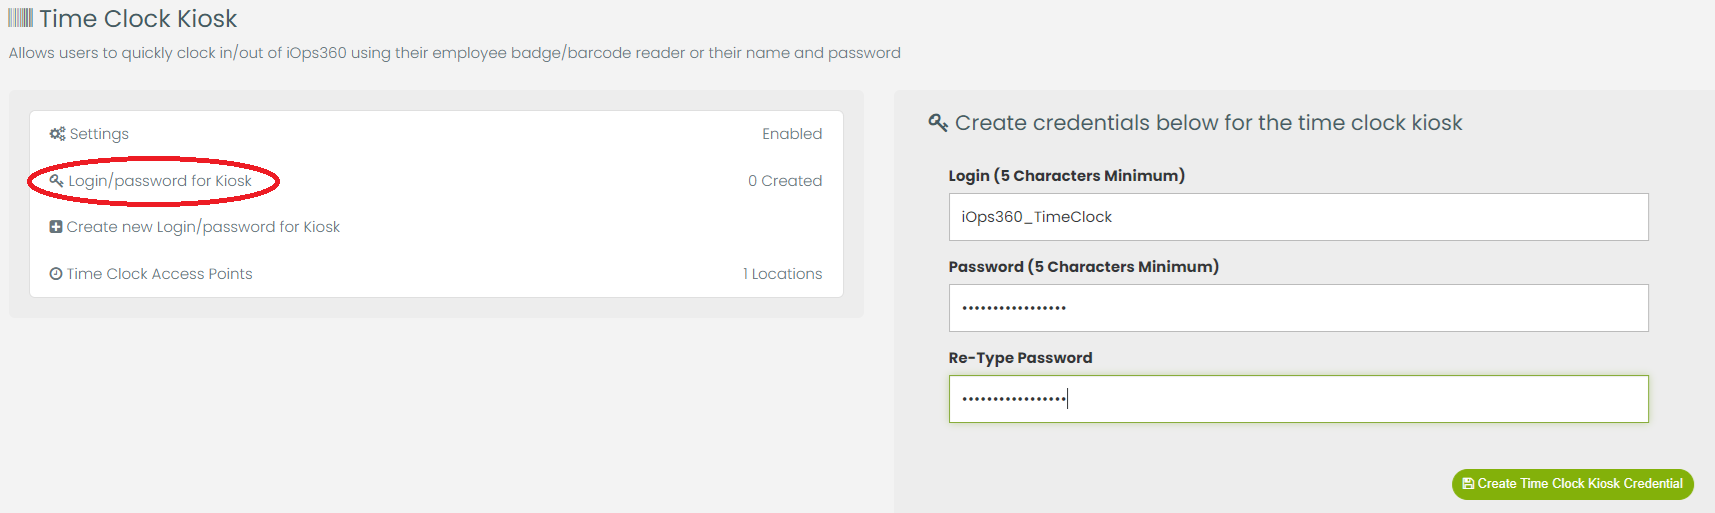
Navigate to System Config > Time Clock > Login/password for Kiosk. Enter the login and password you want to use for the kiosk. Each station can share the same login and password for the Kiosk. Often these will be saved on the computer or placed on a sticker nearby for new staff members. Staff will login with this login and password rather than their normal credentials. This login will stay logged into iOps360 unless a user clicks logout.
Employee Adding / On-Boarding
The RFID reader will compare the employees profile against their badge data. You can save the employee’s RFID badge data into one of 3 fields. The Kiosk will compare the badge scan against the user’s “Badge Number”, “Employee Id” and “Login” fields from their profile. When a new employee is created, edit the employee profile in iOps360. Place your mouse cursor into one of the fields above (i.e. “Login”) and swipe the badge over the the RFID scanner. Then save the user’s profile. If you are adding many employee’s you can use the Mass Edit User’s tool to quickly change many fields at one time. Click on Users from the Menu Bar -> Users List > Mass Edit Users

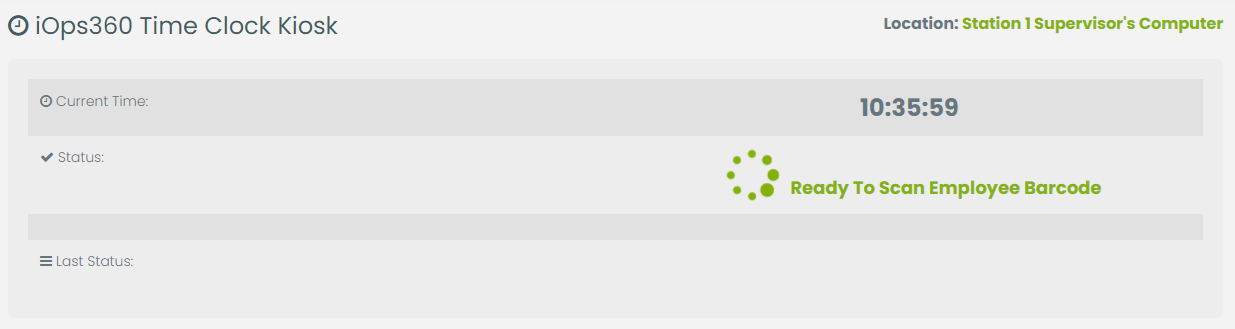
Time Clock Login
Using the time clock kiosk login/password above, navigate to the iOps360 login page. Enter the kiosk login and password. Your session will be authenticated by IP Address or computer hardware, and allow the staff to clock in. Ensure the RFID reader is plugged into the USB port of the computer and simply swipe your badge to record a time stamp.