Calendars are created monthly. Creating a calendar will assign users to their assigned unit for the entire month and process Leave Requests & Shift Swaps.

Click on “Scheduling Admin” -> “Scheduling Admin Menu” -> “Create Calendar“.
Note: Creating a calendar will assign users to units, process Leave Requests & Shift Swaps. The calendar will not be shown to non-admin users until you “Publish” the calendar. This includes the Google Calendar Sync feature.
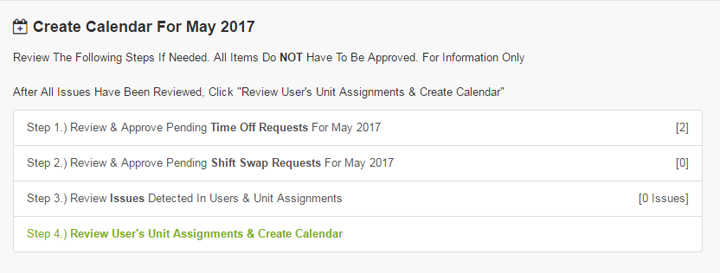
Note: Notifications will be shown to let you know if there are any items you may want to address before proceeding. These items are suggested to be corrected but are not required.
Once you are ready to proceed, click “Step 4.) Review User’s Unit Assignments & Create Calendar“.

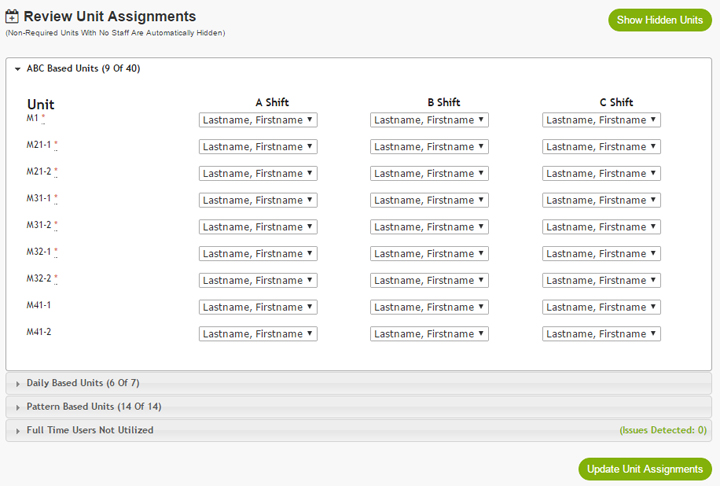
Next, review the ABC(D) based units and the assigned staff. This is the recommended place to change users from one unit to another. (ie User 1 will be moved from M21-1 to M21-2 and User 2 will be moved from M21-2 to M21-1).
Units that do not have a user assigned are are not marked as “Required Coverage” will be hidden. To see the hidden units, click “Show Hidden Units“.
Next, click on Daily Based Units header to review the users assigned to units with Daily Staffing model (ie Admin Monday-Friday units)
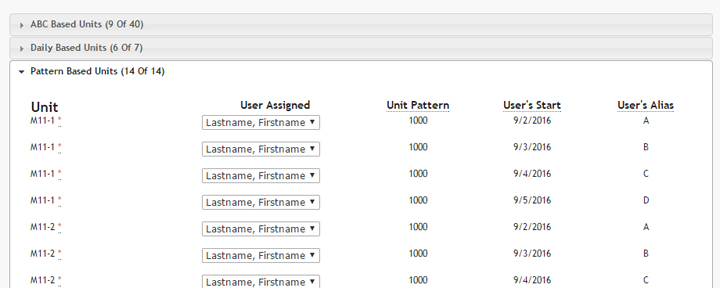
Next, click on Pattern Based Units header to review the users assigned to units with Pattern Staffing model (ie Non-ABCD based units)

If your agency does not use A Shift, then B Shift, then C Shift (and optional D Shift), the patterns allow you to configure any pattern you like. If your agency does not use Pattern based unit staffing, skip to the next header.
Notice that this unit uses a pattern of “1000”. Each digit in the pattern represents a day. Since this pattern has 4 digits, this particular unit pattern will repeat every 4 days. The first day of the pattern, the user will work since the digit is a 1. The next three days the user will be off since the digit is a 0.
This configuration allows you to set the pattern start for each user. For example, Users starting on 9/5/2016 will work 9/5, and be off 9/6, 9/7, and 9/8. Then work again on 9/9/2016.
The User’s Start date is only one date where the pattern is applied. Since there are 4 days in the pattern, any date that the pattern begins will be correct. Typically your agency will have a few dates that will work for nearly every unit. This only applies to situations where your ABC(D) shifts are not in order (ie A shift today, tomorrow is B, then C, then [optionally] D).
Don’t worry too much about the setup of the units as BGS will configure this for you.
Notice the “User Alias” column. This provides an easy resource to associate any pattern start date back to a simple A,B,C,D type alias for your sanity.
Next, review the “Full Time Users Not Utilized” and ensure that if any users are present, they are supposed to not have a unit assignment.
Once you have verified all users and made any changes, click “Update Unit Assignments“.

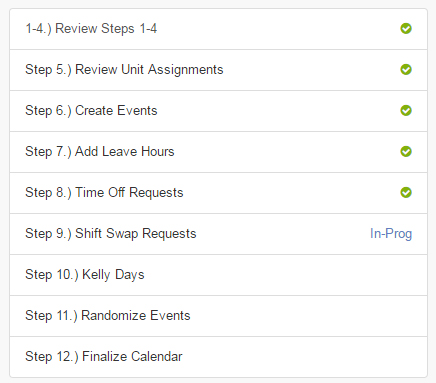
Depending on your system configuration, some or all of these options will occur. Once all steps have completed, you will be redirected back to the Schedule Admin Menu to begin assigning users to cover Approved Leave Requests.
Next, click on “Open Shift Details” to assign Available Users to open events created by approved Leave Requests.
Note: Don’t forget to Publish the calendar for Non-Admin staff to see their schedule.
Also See -> Schedule Editing.
